
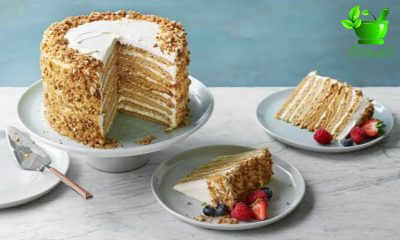
Russian Honey Cake
This recipe appears complex, but — when broken down — it’s actually fairly simple. The biggest requirement is time (and lots of parchment paper!). The good news is honey cake lends itself well (requires it, even) to being made ahead. Make the dough one day; shape and bake the layers another; whip the filling and assemble the cake on the third.
Baking the layers in a rimmed baking sheet then cutting and stacking them really streamlines the process. Where other recipes have you baking six to eight different layers, sometimes individually, this is a significantly faster, more efficient method — and the end result is no less majestic. Believe me when I say the “hardest” part of this recipe is rolling the layers out. Go slowly; returning the dough to the fridge if it’s becoming too soft, and make sure the dough is rolled out thinly and evenly. Your patience will be rewarded with precise, mesmerizing layers once cut. The rest comes together so quickly. If, like me, you are not the greatest at creating smooth sides on a cake, then let me tell you: This cake was made for us! The clinging cake crumbs on the sides hide a multitude of sins.
What Is a Traditional Russian Honey Cake (Medovik)?
Russian honey cake, or medovik, is a multi-layered cake that originates from the former USSR. Sugar — particularly white, refined sugar — is a more recent invention in the larger picture of human evolution. Prior to the near-universal adoption of sugar, other naturally occurring sweeteners like boiled-down fruit juice or honey were widely used. Honey was the primary sweetener in Russia, used in fermented beverages and baked goods. While there are many versions of honey cakes, including some with apples or nuts, medovik today is often considered as this version made of many thin layers of cookie-like cake (or cake-like cookie!) and a creamy filling.
How Long Does Honey Cake Last?
Any leftovers will keep well in the fridge for up to three days. Once sliced, wrap loosely in plastic wrap to prevent exposed sides from drying. If storing as slices, transfer to an airtight container.
Can I Freeze Honey Cake?
Honey cake can be frozen loosely wrapped in plastic wrap and placed inside an airtight container for up to one month. Thaw overnight in the refrigerator. Remove the container and plastic wrap after the cake is fully thawed.
What Type of Honey Is Best for Honey Cake?
Almost any runny honey will work in this recipe. Whatever honey you choose, make sure it is liquid at room temperature and without any additions like honeycomb.
- For a mellower flavor, stick to milder honeys like wildflower or clover.
- For a more intense honey flavor, dark honeys like buckwheat, chestnut, or leatherwood will work well.
Honey Cake Recipe
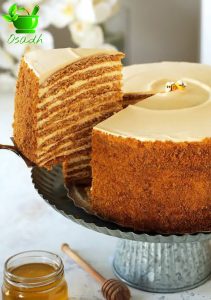
While there are many versions of honey cakes, including some with apples or nuts, medovik today is often considered as this version made of many thin layers of cookie-like cake (or cake-like cookie!) and a creamy filling
Yield Serves: 10 Prep. Time: 1 Hour 30 Min. Cook Time: 25 Min.
INGREDIENTS
For the cake:
- 1 Large egg
- 1 1/2 sticks : (6 ounces) unsalted butter
- 3/4 cup : Packed light brown sugar
- 1/2 cup : Honey
- 1 1/2 teaspoons : Kosher salt
- 1 teaspoon : Ground cinnamon
- 3 1/2 cups : Bleached all-purpose flour
- 1 teaspoon : Baking soda
- 1/2 teaspoon : Baking powder
For the filling:
- 1 (16-ounce) container : Sour cream
- 1 (about 13-ounce) can : Caramelized milk
- 1/4 cup : Honey
- 1 teaspoon : Kosher salt
- 1 quart : Cold heavy cream
INSTRUCTIONS
Make the cake:
- Let 1 large egg sit at room temperature.
- Place 1 1/2 sticks unsalted butter in a large microwave-safe bowl and microwave until melted. (Alternatively, melt the butter in a small saucepan on the stovetop, and then transfer to a large bowl.)
- Add 3/4 cup packed light brown sugar; 1/2 cup honey; 1 1/2 teaspoons kosher salt, and 1 teaspoon ground cinnamon, and whisk to combine. The mixture should be just warm at this point (if it feels very hot, leave it to cool for a few minutes before the next step). Add the egg and whisk to combine.
- Add 3 1/2 cups bleached all-purpose flour, 1 teaspoon baking soda, and 1/2 teaspoon baking powder, and stir with a large rubber spatula until the flour is fully incorporated with no dry steaks visible. The dough will form a ball and look glossy and slightly sticky.
- Divide the dough in half (about 17 1/2 ounces each). Wrap each half in plastic wrap and shape into a flat rectangle of even thickness (the exact size doesn’t matter). Refrigerate the dough until firm, at least 1 hour and up to 2 days.
- Arrange 2 racks to divide the oven into thirds and heat the oven to 350°F. Roll out one piece of dough at a time (keep the other half in the refrigerator): place the dough between 2 sheets of parchment paper. Roll out to a rectangle that is just under 16×12-inches and 1/16-inch thick.
- Transfer the dough, still sandwiched between the parchment papers, to a rimmed baking sheet. Peel away the top layer of parchment. Repeat rolling out the second piece of dough and place on a second rimmed baking sheet.
- Bake, rotating the baking sheets from front to back and top to bottom halfway through, until pale golden brown, 10 to 12 minutes total. The layers will be soft with slightly firmer edges and the surface will no longer look wet or shiny. Let the cake cool on the baking sheets for 10 minutes. Transfer, still on the parchment, to wire racks to cool completely.
- Reduce the oven temperature to 325°F. When the layers are completely cooled, cut each sheet crosswise into 4 pieces.
- Place one of the pieces back on a baking sheet. Return to the oven and bake until deep golden brown, 12 to 15 minutes. Let cool completely on the baking sheet (it will become crisp). Place in a food processor and pulse into fine crumbs. (Alternatively, break the piece into large pieces, then transfer to a large zip-top bag and use a rolling pin to crush into fine crumbs.)
Make the filling:
- Place 16 ounces sour cream, 1 (13.4-ounce) can Caramelized Milk , 1/4 cup honey, and 1 teaspoon kosher salt in a stand mixer (or large bowl if using an electric hand mixer or whisking by hand). Beat with the whisk attachment on low speed until just combined. Scrape down the sides of the bowl with a rubber spatula. Add 1 quart cold heavy cream and beat on medium-high speed until glossy and fluffy and medium-firm peaks form when the whisk is lifted, 10 to 14 minutes.
- Remove the bowl from the mixer. Whisk the mixture briefly by hand to ensure all the cream is evenly whipped.
Assemble the cake:
- Place one cake piece on a platter or board that will fit in the refrigerator. Spoon about 1 heaping cup of the filling onto the cake, then spread into an even layer with a small offset spatula, going all the way to the edges. Repeat layering the remaining 6 cake layers and filling, ending with a layer of cream (you should have some cream leftover). As you spread and layer the filling, some will slide down the sides; that’s OK!.
- Spread the remaining cream onto the sides of the cake, making sure the entire cake, including the corners, are fully covered. Press the reserved cake crumbs around the bottom edge of the cake.
- Refrigerate the cake uncovered overnight so the layers can fully soften. Serve the cake chilled, cut into thin slices.
RECIPE NOTES
Make ahead:
The cake can be made, fully assembled, and refrigerated up to 3 days ahead.
Storage:
Leftovers will keep refrigerated in an airtight container (if sliced) or covered loosely in plastic wrap (if not cut into portions) for up to 3 days.